A common gardener’s dilemma is how to grow an edible garden in the shade. During my arduous gardening journey, I learned a few cardinal rules to follow if you want to cultivate a productive garden in less-than-ideal circumstances.

So, if you find yourself in my shoes, don’t despair, there is an array of beautiful plants that you can add to your garden – even if it is in the shade! Follow my planting tips for ten edible plants that grow in full shade and enjoy the fruits of your labor!
1. Daylilies Are Surprisingly Delicious!
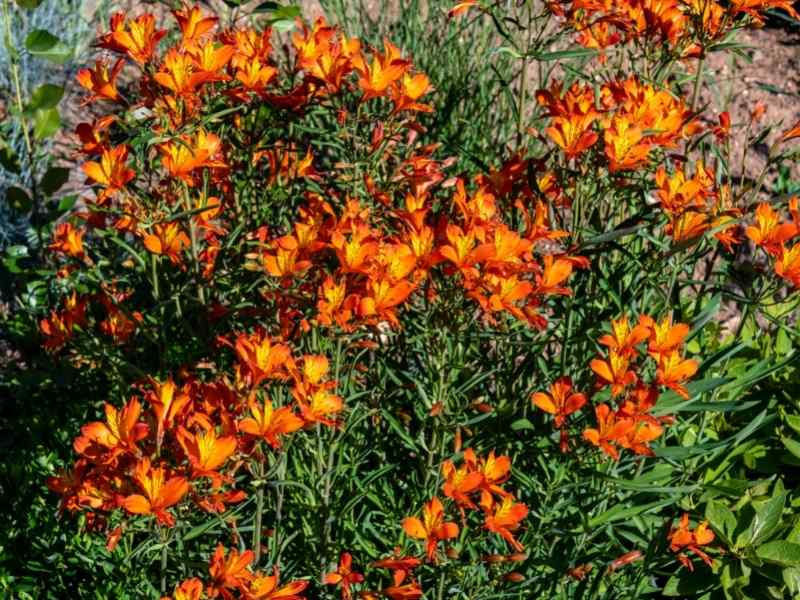
Daylilies (Hemerocallis), especially the orange-colored variety, grows abundantly in the wild as Americans of European descent brought them to this country to cultivate them as a food source.
These beautiful flowers are cultivated as food crops in several Asian countries like Japan and China, where they are dried to thicken and flavor soups.
While we cannot be certain that all Daylily varieties are perfectly edible, older varieties like the Hemerocallis fulva certainly is edible. All aspects of the flowers are edible and delicious in their own way.
Daylily tubers taste surprisingly like nutty potatoes and are typically braised. Their shoots or leaves taste like a blend of cucumber, and lettuce with a hint of an onion flavor.
The most sumptuous elements of this plant are their flower petals and buds, which have a velvety soft texture and a nectary and sweet taste which can be pickled or eaten raw. They are also beautiful additions to salads.
The “cherry on top” is that flowers are also highly nutritious as they contain vitamin A, iron, carbohydrates, and protein. So, munch away!

Daylily Planting Tips
Daylilies are incredibly resilient, so you should have a magnificent harvest if they are planted correctly in spring.
Before you start planting, assess your garden soil, especially if you have a lot of clay (like I do) or sandy soil – add lots of good quality complimentary organic matter.
Test your soil as Daylilies prefer more acidic soil, which you might need to address with bespoke gardening additives.
Start the planting process by digging a hole twice as deep and wide as the plant for its roots to spread out. Now insert the plant in the hole while ensuring that the roots are approximately 1 inch lower than the ground level.
Then add the modified organic matter that is suited to your garden soil and water its property. Continue to water your Daylilies for a couple of weeks until they have settled in
The tubers may be harvested in the fall when the flowers go dormant or in early spring. In contrast, the budding leaves should be harvested in the latter part of winter and the flower petals in late spring.
2. Garlic And Chives: A Marriage Made In Heaven
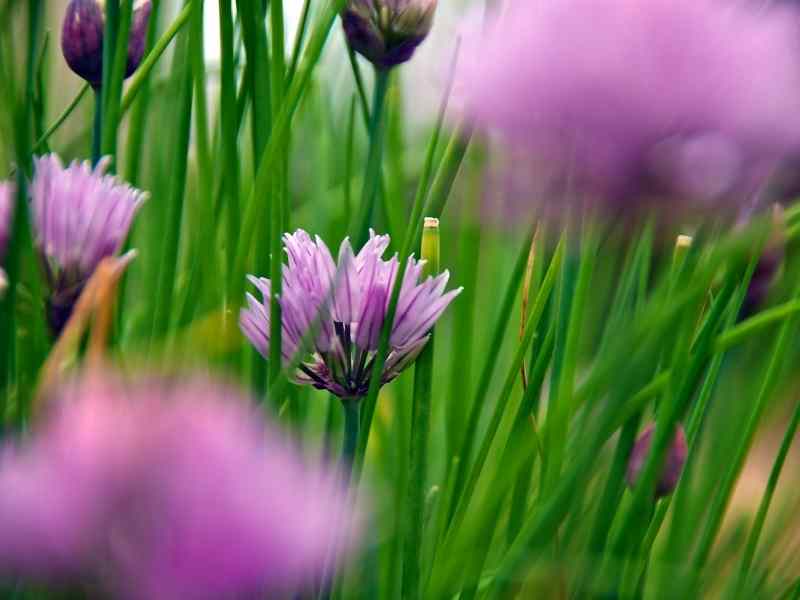
Alliums like garlic and chives can be grown successfully in shady areas. While your harvested plants will not be as large as those cultivated in sunny areas, they should yield a prolific harvest.
Garlic Planting Tips
Garlic should ideally be planted during the fall, approximately six weeks before winter.
Start the planting process by losing your garden soil with a depth of approximately 8 inches, then add granular, slow-release organic fertilizers (including sand for clay soil).
I prefer planting garlic cloves that have already grown green shoots. However, if you only have a full garlic head, carefully break it apart with its protective skins intact into separate cloves.
Plant the cloves 3-4 inches deep with their pointed ends, or green shoots facing upwards, water gently, then cover it with a thick layer of straw mulch to keep it warm during the upcoming colder months.
Knowing when to harvest your established garlic plants is not as easy as it seems. If the bottom leaves turn brown or yellow, you have a good chance of viable harvesting bulbs.
Chives Planting Tips
Chives are great perennial plant additions to your garden as they can be harvested much earlier than other herbs.
They are super easy to grow! If you start the planting process with chive seeds, use indoor grow lights during the winter months until they are approximately 8-12 weeks old.

Now they should be ready to be planted in your garden. Prepare the area where you would like to plant your chives by digging and loosening the soil and adding an appropriate fertilizer. Once that is done, plant your chives and water them well.
3. Ginger: The Spice of Life
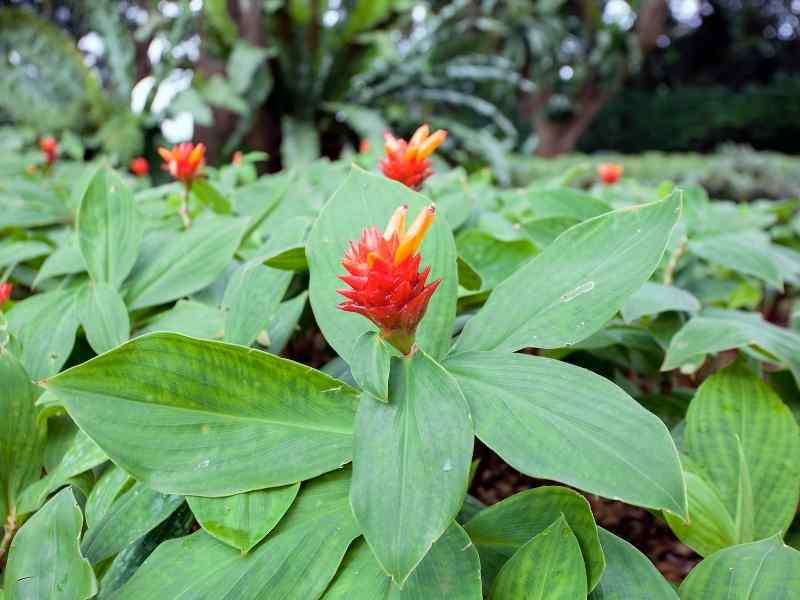
Ginger with its earthy, spicy flavor is an indispensable ingredient for so many dishes, and it packs a nutritional punch way above its weight!
Apart from the rhizomes (stem), the flowers and leaves are also edible, which means nothing will be wasted.
Ginger Planting Tips
Ginger should ideally be planted in the period between the last and first frosting periods in your region.
Commercially grown ginger is often treated with growth-inhibiting substances. However, organic ginger might start sprouting, which makes them prime candidates for your garden.
Choose your ginger stems (rhizomes) wisely by selecting thicker sections with lots of swollen buds at the end, preferably ones with green shoots.
Ginger may either be planted whole or as carefully selected smaller pieces with a minimum of two eyes per stem.
Smaller pieces should be dried out in a warm area until they have formed calluses, and whole rhizomes should be soaked in warm water the night before they are planted.

If you live in a colder climate, start growing your plant indoors under grow lights as rhizomes take nine months to produce a substantial harvest.
Whether you decide to grow them in your garden or indoors, ensure that the rhizomes are planted in warm, fertile soil (68ºF-77 ºF), approximately one inch in depth with the buds pointed upwards, and water it gently.
Ginger planted in the early summer months should be ready for harvest after about four months. In warmer climates, they can remain in the ground during the wintertime.
4. Parsley & Cilantro: Meet The Apiaceae Family
Parsley and Cilantro are both aromatic herbs that are perfect additions to your shady garden. Parsley thrives in the shade, and your Cilantro will not bolt as quickly as it would in a sunny area.
Parsley Planting Tips
Parsley can either be classified as flat-leaved, Italian parsley, or curled-leaved parsley. However, they all have the same delicious earthy flavor.
It is a biennial herb that only produces foliage during its initial growing season and tends to survive mild winters as it’s a cold-resistant plant.
Ideally, it should be planted in your garden during springtime if you want a great harvest the following year.
If you are using parsley seeds, grow them indoors during the winter months for 8-10 weeks before the last anticipated springtime frost.
Once the seedlings have reached a more mature stage, follow my previously mentioned growing tips and enjoy watching them grow.
Cilantro Planting Tips
Cilantro, with its intense, delicious flavor, is an essential ingredient in so many dishes.
This annual herb should ideally be planted in extended cool weather conditions. However, there are a few essential steps to take before they can be planted in your garden.
Like other planting methods, you can either use seeds or purchase young plants from your nursery.
The seed planting method: cooks will recognize cilantro seeds like coriander, which comprises of two seeds in a grey or light brown protective husk.

It is essential to prepare the cilantro seeds before planting to ensure that they will germinate. Gently remove the husk and soak them in some water for 24-48 hours. Then let them dry out.
Then it’s time to plant them in either indoor or outdoor containers. Cover the seeds with a thin layer of soil (a ¼ of an inch) and water it gently.
Once the germinated cilantro seeds resemble viable young plants, they can be transplanted in your garden. Dig your planting holes approximately 3-4 inches apart and water them generously once they have been planted.
5. Lettuces: Our Salad Essentials
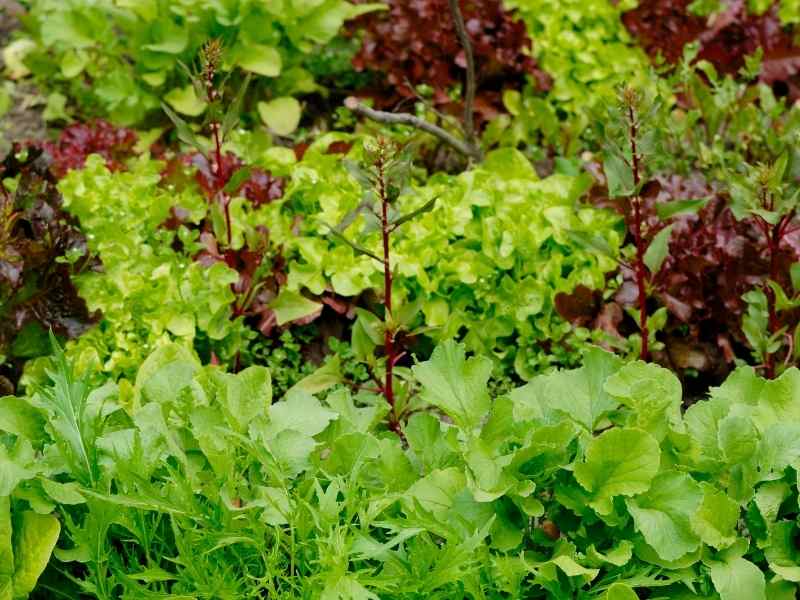
Lettuces and other nutritious greens dislike growing in hot climates. Once temperatures soar, their lettuce flowers release seeds and become bitter.
While lettuces love shady conditions, choosing varieties like Lamb’s Lettuce (aka Corn Salad, or Mâché), Simpson’s Elite, or Red Salad Bowl lettuce is imperative.
Lettuce Planting Tips
Lettuces should ideally be planted during the spring season, approximately two weeks before the last frost.
Prepare your planting bed by loosening the soil and ensuring adequate drainage by adding nutrient-rich, organic compost.
Plant your seeds at a shallow depth of approximately a quarter to a half an inch deep, either in traditional rows or mix red and green lettuce seeds for a pop of color. Space to rows out in accordance with the seed packet instructions as lettuces varies in size.

6. Pawpaws: Delicious Fruit Right On Your Doorstep
While it may take longer for your pawpaw trees to bear fruit in a shady area until they grow enough to get more sun – they are undoubtedly worth planting!
Pawpaws are perennial plants with fruit that taste like a delicious blend between banana and mango custard.
Pawpaw Planting Tips
Pawpaw trees should be planted in spring or during the fall period. You will have a better success rate with young tree transplants or root cuttings (avoid wild pawpaw cuttings).
Prepare the flower bed by firstly testing the soil. Pawpaws thrive in well-drained, nutrient-rich soil with a pH level ranging from 5.5-7.0. Then add a good quality fertilizer to the soil.
Pawpaw tree taproots need a lot of space to grow, so dig a hole with a depth of a foot’s loose soil and three times the root’s width.
Most importantly, pawpaw trees cannot self-pollinate. Therefore, plant two trees approximately 15 feet apart with ample space for them to grow.

To transplant a cutting or a young tree, start by gently detangling the tree’s roots and remove most (but not all the soil) to prevent a transplant shock.
Once the tree is planted, compact the soil at the base of the tree and water well. Remember to keep the tree soil moist throughout its growing season.
Their flowers will blossom in the latter part of winter, following which their leaves will develop and fade away in fall. Their fruit will be ready to harvest between August and September each year.
7. Mint Plants: Welcome To The Lamiaceae Family
Mint plants like mountain mint or spearmint belong to the Lamiaceae plant family and thrive in shady garden areas.
While some mint plants are annuals or perennials, they all pack a punch with flavor and have profound medicinal uses.
Mint Planting Tips
All mint varieties should be planted during spring or in fall when your climate is moderate.
However, a word of warning is advised as mint plants are incredibly tenacious and tend to spread quickly.
If you want to plant any of the Lamiaceae plant varieties, allocate enough space for them in your garden, and prepare the planting bed as per my previous tips. Alternatively, plant them in containers for shady areas to stop them from spreading.

8. Alpine Strawberries: A Sweet Forrest Berry Delight
Alpine Strawberries are perfect companions for deciduous trees in shady areas of your garden as it is a ground covering wild berry that grows in forested areas.
They are relatively small compared to commercially grown North American strawberries. However, nothing compares with their sumptuous pineapple-rose deliciousness!
Alpine Strawberry planting tips
It is relatively easy to grow these Alpine Strawberries from seeds or with divided berry crowns, and once they have settled in, they tend to self-seed and spread in the right conditions.
Should you decide to use seeds, do so well in advance of the planting season as they take up to 12 weeks to mature into viable little seedlings.
Start the planting process by sowing the seeds in a well-drained seedling container, covering them lightly with soil, and placing them in a water pan to keep them hydrated.

After approximately a month, transplant your seedlings into separate containers to acclimatize them for life outdoors slowly. Once the frost period has passed, they are ready to be planted in your garden.
If your seedlings were planted in spring, they will be ready for harvesting in the summer and will bear fruit every spring in the years to come.
9. Blueberries: Packed With Antioxidants
Indigenous wild Blueberry cultivars flourish in shady habitats. Commercially produced perennial lowbush and highbush Blueberry varieties are suited to low-light habitats if planted in gardens with acidic soil.
Blueberries Planting Tips
Spring is the perfect time to plant Blueberries; however, preparation is key!
Blueberries require organically rich, well-drained acidic soil, preferably with sandy loam. Therefore, it might be time to use your trusty soil tester to ensure that it has a 4-5 acidity level.
Although Blueberries can bear fruit on their own, planting other Blueberry varieties that will blossom simultaneously will aid cross-pollination is advised as they will produce more fruit.

Plant your Blueberry varieties approximately 4-5 feet apart, and once they are planted, cover them with a layer of organic mulch to limit weeds.
Most importantly, to allow the plant to grow to maturity, pinch back its flowers for the first two years, stopping them from yielding fruit. While it sounds counterintuitive, your patience will be rewarded.
10. Hostas For Lunch Anyone?
You might be surprised to hear that Hostas are edible; as a matter of fact, they are commonly enjoyed in several Asian countries as their shoots taste like Asparagus.
While there are several Hosta varieties, some may taste more delicious than others, all aspects of these beautiful plants are edible and perfectly suited to shaded gardens.
Hostas Planting Tips
Hostas should be planted in spring. However, you can plant Hostas in the fall if they have adequate time to settle in before winter.
If you decide to use bare-rooted plants, soak them in water for a few hours before you plant them.

Start the planting process by digging a hole that will allow your Hostas roots to spread sideways and add good quality compost and slow-release fertilizers to retain moisture. Then plant your Hostas, compact the soil, and cover it with a good quality mulch.
Conclusion
Cultivating a thriving garden in a fully shaded area is certainly possible if you follow my tried and tested planting tips to create the ideal growing environment.
While edible plants that grow in shaded areas might not be as prolific – your rewards will be incalculable.


