If you’re like me you like to make use of as many places as possible in your yard to grow food but what do you do when you have a shady spot where plants won’t grow very well? Why not grow some mushrooms!
Make Use Of A Shady Spot
For a long time, I have wondered how to make use of what seemed like a useless space on the north side of my house. It was a space 7 feet wide by 12 feet long with only a couple hours of sunlight a day on different portions of it. It’s possible a few leafy greens would grow there but probably not very well, but the conditions of this area are perfect for growing mushrooms. So I decided on an easy-to-grow variety called Wine Cap Mushrooms.

The truth is when it comes to growing mushrooms it isn’t so much about how much sunlight they get as how much moisture can be retained in the grow medium. Obviously, a raised garden bed in full sunlight will dry out much quicker than a garden bed with only a couple of hours of sunlight. The mushroom growing medium must remain damp at least below the surface at all times for best results.
What Are Wine Cap Mushrooms?
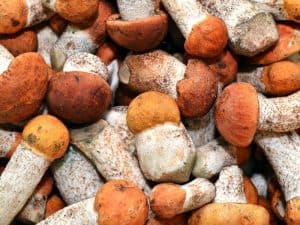
Wine Cap Mushrooms or Stropharia rugosoannulata or “King Stropharia” are considered one of the easiest mushrooms to grow. The cap of the mushroom can vary in size having a small red button top in young mushrooms to a large red cap when fully mature. The stems are a creamy white color with no bulb at the bottom. When grown in the shade they have a red top but can be tan colored if grown in the sun.

These mushrooms are typically grown in wood chips or straw which I thought would be perfect for a raised bed in my particular spot. The best time to plant the spawn is in Spring after any chance of a late frost and typically takes between 2 and 10 months before fruiting depending on growing conditions.
Where Do You Get Wine Cap Mushroom Spawn?
I ordered my mushroom spawn from Field and Forest which I promptly received with great instructions on what to do with the spawn in order to get the best results.
I really like this company as they have been growing high quality mushroom spawn since 1983. They crafted the first organic standards for certified organic mushroom cultivation on logs, they advocated for final passage the use of cheese wax in organic mushroom production, and are 100% committed to sustainable cultivation of mushrooms on logs and associated forest management. All of the spawn they offer is produced to certified organic standards.

Where Can You Grow Wine Cap Mushrooms?
You wouldn’t have to grow these in a raised bed filled with mulch as I have chosen to do, you can also inoculate mulch pathways and mulch that has been used around trees and landscape as well which is a great way to add food production to spaces that are already there.
As I said earlier, the key is to have them in a place with sufficient moisture. Too sunny and it will dry out fast so a shady spot works best. I’m a proponent of function stacking so if you can combine your mushroom beds with pathways and mulch rings around trees these seem like great options as well.

Building The Raised Bed
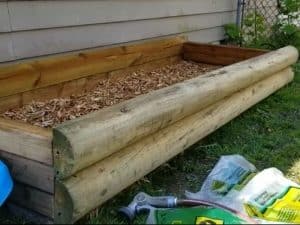
So here is what I did. I built a 3 foot by 8 foot raised bed against the north side of my house. I put down some soaked cardboard in the bottom. I then spread out about 3 inches of hardwood mulch on the bottom of the bed. You don’t want to put any kind of weed barrier in the bottom of this bed, just cardboard, as the growing medium should have soil contact.

Preparing The Mushroom Spawn Grow Medium
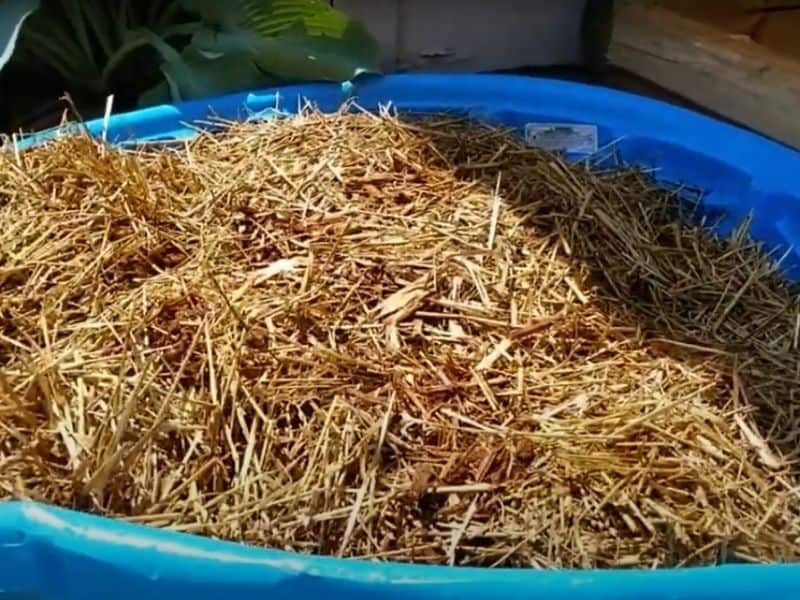
I hosed down the bottom layer of wood chips until they were saturated in water. I then added straw that had been soaking in a kiddie pool filled with water for about 6 days. I spread this straw about 3 inches deep over the bottom layer of wood chips and then took my bag of mushroom spawn and spread it all over the soaked straw.

Then I added about 2 more inches of the wood chips over the inoculated straw and sprayed it down with the hose also. That’s it, the mushroom bed is done. You just want to make sure it never gets overly dry throughout the summer and in a few months and a couple of years following you should be harvesting beautiful and tasty wine cap mushrooms.

Below is another great video explaining how to make a wine cap mushroom bed on the ground without raised wood sides.
Further Function Stacking
I proceeded to take things a little further for this previously useless space and build a rhubarb bed and pathway in the area as well and also put up a small fence and gate to keep my dog from walking on the bed and possibly crushing the mushrooms.
I hope this has given you an idea of what you can do to produce more food on your homestead with a space that gets too much shade for anything else. Happy Homesteading!


