Growing a garden in raised beds has many benefits but can sometimes be a little costly depending on what you build them out of. I’m all about being frugal and using what I have or what I can get cheap or free for my homestead projects, and pallets seem to be one of those things that just seem to be easy to get for free. I love having free lumber but there are a few things you want to consider before using pallets for your projects.

Sometimes Saving Money Does Have A Cost
I have found there is usually a trade-off between time and work for money. What I mean by this is by using pallets I save a lot of money on lumber but it can be a lot of work and time making usable lumber out of the pallets by breaking them down and removing nails. Never ignore the fact that your time and energy are worth something, so you have to always weigh the actual cost to determine if the money you save is worth the other expense.
Make Sure You’re Using The Right Kind Of Pallets For Your Project
If your using pallets for a garden bed you want to make sure you’re using pallets that haven’t been chemically treated. I don’t discard all chemically treated pallets personally, I just use them for projects that have nothing to do with my food or constant contact. Check out this website www.1001pallets.com pallet-safety for more information about determining how your pallets have been treated. This is an important step that you do not want to skip.

Pallets Take Up A Lot Of Space
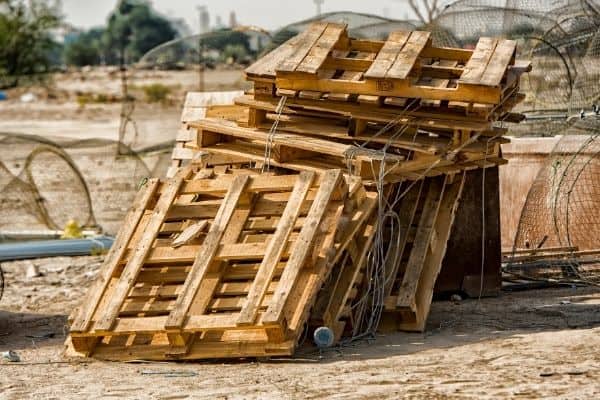
Something I hadn’t considered and may not be a problem or a big deal to some people is the space unused pallets take up and the eyesore they can create when you are storing them between projects. I didn’t have any extra room in my buildings so I stacked them outside for a couple of months before getting around to my raised bed project and what a mess.
I suppose if you broke them down and stacked the lumber rather than just stacking up the pallets as you brought them home it would fix this issue, but as poet Robert Burns put it “the best-laid plans of mice and men often go awry”. All these things considered I still believe using pallets for homestead projects is worth it because of the money saved and their availability.
So How Did I Make My Raised Beds From Pallets?
I just happened to get my hands on about two hundred quarter pallets, these pallets measured out at 20″ x 24″, this saved me a lot of work as I didn’t have to bet the boards to a shorter length to reduce the height of the raised beds.

Breaking Down The Pallets
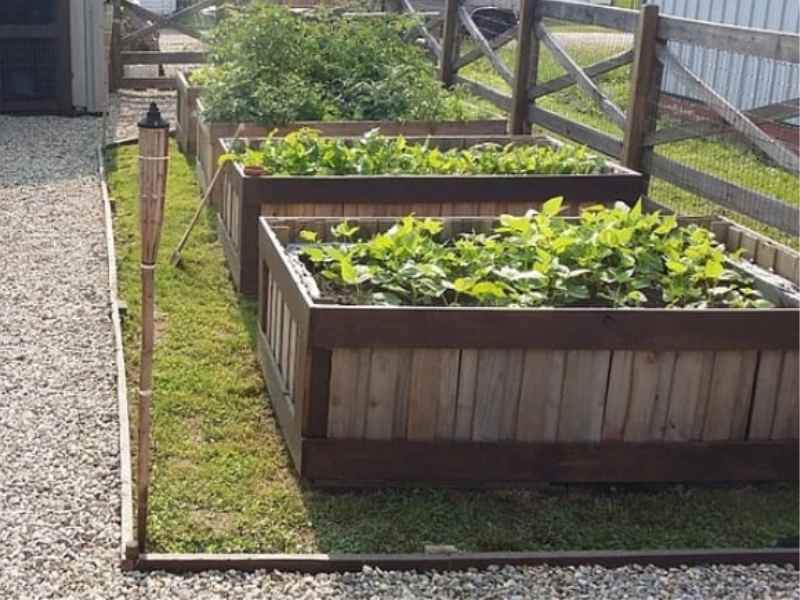
I took apart some of these pallets quickly by using a Reciprocating Saw and just sliding it between the boards and cutting the nails, I had to do it this way because when I would try to pry the boards off I kept breaking the boards because these quarter pallets use a little thinner wood. The reason I only broke down some of the pallets is so that instead of building the bedsides from scratch I simply kept the pallets whole and used the boards from the broken down pallets to cover the gaps between the boards as seen in the picture above.
- Up to 2.5x more runtime**
- Compact 14.5' length fits in between studs & in other tight spots
- Only 5 lbs. in weight (tool only)
Last update on 2025-07-05 / Affiliate links / Images from Amazon Product Advertising API
If you’re using regular full-size pallets with thicker wood you can use a tool called a Pallet Buster to quickly break down a pallet. I purchased one of these a couple of years ago and it made working with pallet wood a lot easier and faster which changed my thinking about my time/energy to wood cost analysis. There were times I was breaking down pallets with a hammer and crowbar thinking it just wasn’t worth the trouble, so do yourself a favor and pick up this tool if you plan on doing a lot of pallet projects.
- Deluxe pallet buster is designed for disassembling pallets easily
- Articulating head won't break or split the wood
- Features durable construction for added strength and long life
Last update on 2025-07-05 / Affiliate links / Images from Amazon Product Advertising API
“It’s kinda funny, the older I get the taller my raised beds seem to get.”
Building The Raised Beds
After I put together all the sides of the raised beds I took some large 4′ x 8′ pallets I had and broke them down. These pallets had 8′ – 1″ x 6″ boards in them. I used these boards to go around the raised beds and hold the pallet sides together. These longer boards also broke up the pattern of the sides and gave the beds a nice look as well as stability when they were finished.

Protecting The Wood For A Long Lasting Raised Bed
I then lined the wood on the inside of the boxes with a heavy landscape fabric which keeps the soil from washing out between any small gaps in the boards but allows for good drainage. This also kept the soil from making direct contact with the wood which helps with the longevity of the beds. I then painted the borders and added a water sealer to the outside of the beds to give them some durability against the elements and hopefully get years of use out of them.
- Premium weed barrier landscape fabric to make your life easier and skyrocket...
- Super-easy to install and set up landscaping fabric to provide unparalleled weed...
- Garden weed barrier mat designed to conserve your soil's moisture and preserve...
Last update on 2025-07-05 / Affiliate links / Images from Amazon Product Advertising API
Filling The Raised Beds
After I put these all together and placed them where I wanted them I filled the beds about two-thirds the way to the top with organic material such as logs, branches, leaves, and grass clippings. I did this to reduce the amount of soil I would have to put in them still leaving me about 14″ of soil after leaving it down a couple of inches from the top. This organic material also serves to hold moisture and creates what I will call a modified hugelkultur effect which will provide months and sometimes years of composted nutrients for the plants as the materiel breaks down.

After all that I was ready to fill with a good soil mix and plant my garden. The soil mix I prefer, especially when just starting out, is Mel’s Mix. This soil mix was the brainchild of Mel Bartholomew from his book Square Foot Gardening, which is an excellent resource.
The Mel’s Mix consists of:
- 1/3 peat moss (or coco coir)
- 1/3 coarse vermiculite
- 1/3 of a well-blended compost made from at least 5 different sources, if possible, or use your own homemade compost.
- Bartholomew, Mel (Author)
- English (Publication Language)
- 272 Pages - 11/27/2018 (Publication Date) - Cool Springs Press (Publisher)
Last update on 2025-07-05 / Affiliate links / Images from Amazon Product Advertising API
Now You Have Beautiful And Useful Raised Garden Beds
There are actually several ways to design raised bed gardens made from pallet wood but this design is aesthetically pleasing to me. The crops are doing well and I believe these simple, inexpensive garden beds look good and function well, and were a great addition to the permaculture homestead.
Should You Build Raised Beds?
Perhaps you are on the fence about whether or not Raised Garden Beds are right for you or not, and there are things to consider so check out this podcast episode I did on the Modern Homesteading Podcast which lays out several reasons you may want to use raised beds instead of planting directly in the ground.


